Events
- Campaign link events
- Lander events
- LP-Pixel lander events
- Click URL events
- Conversion events
- Use examples
For certain task categories, there's a need to assign variables to clicks. For instance, if you want to pass the number of items in a cart to a tracker or find out how much time a user spent on a landing page, the event system can help. With it, you can set and update numerical variables at any click processing stage.
Note that in Binom tracker v2, the maximum number of available events has increased from 10 to 30.
There are two ways to pass events:
GET-parameter eventX=
GET-parameter add_eventX=
The difference lies in the fact that 'event' simply updates the previous event value with a new one, while 'add_event' adds the new value to the previous one. For example, if you have a survey form on a landing page, you can track how many questions a user answered by sending a request to the tracker after each question like tracker.com/click?lp=1&add_event2=1.
So, if a user answers 4 questions, event2 in the tracker will be 4.
To view the desired event in the tracker, you need to display the column of this event in the table, report, or on the Clicklog page. You can also create a custom column if you want to add your own metric, the formula of which includes the event.
Events allow passing both positive and negative numbers to the tracker but don't support text values. If you want to pass a text value to the tracker, you can use the token system.
Passing events in the campaign link
If you want to send an event to the tracker along with receiving a new click, you just need to add the event parameter to the campaign link:
https:/tracker.com/click?key=1234&campid={campaignid}&adposition={adposition}&placement={placement}&event3=10
In this example, after clicking the campaign link, event3 of the new click will be assigned the value 10.
Passing events from the landing page
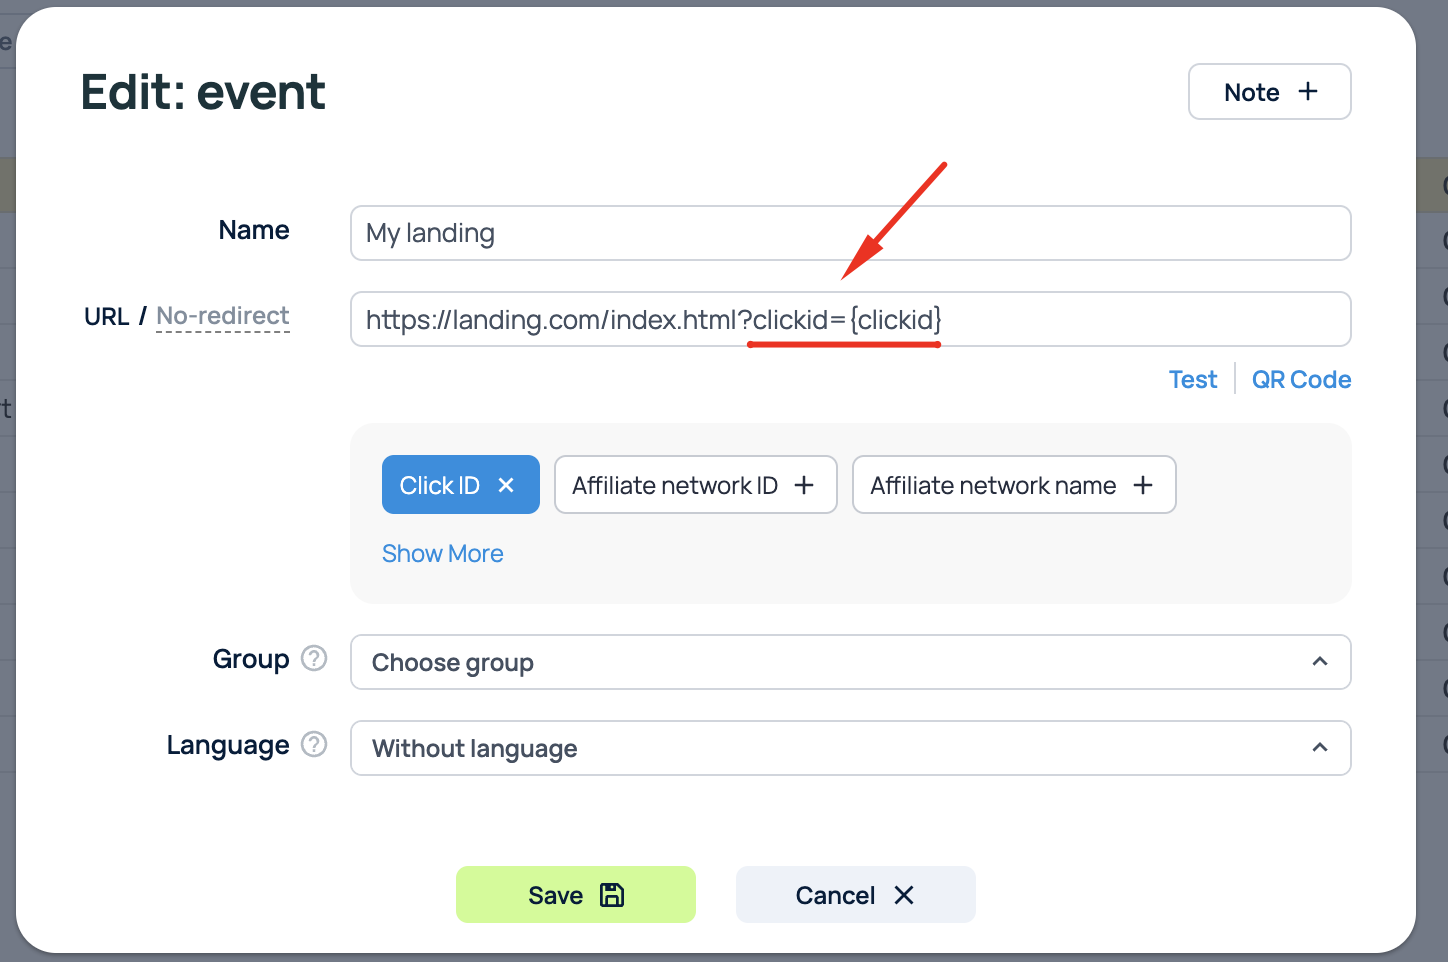
To pass an event from the landing page, you first need to append the clickid parameter to the landing page link:

After that, you can pass events from the landing page using the following code:
<script>
const clickid = new URLSearchParams(window.location.search).get('clickid');
  fetch('https://tracker.com/click?upd_clickid=' + clickid + '&add_event1=999', {
    mode: 'no-cors',
  });
</script>
Passing events from the landing page with LP pixel
If you use an LP pixel on the landing page, you can use the pixel code to update the click:
<script>
       BPixelJS.update({
    url: 'https://tracker.com/click',
    updateKey: 'update_key_from_settings', // optional, if updateKey is set in Settings
    tokens: {
      add_event1: '999',
    }
  })
</script>
This way, when the page with this code is visited, the click will be assigned the value 999 for event1.
Passing events in the offer link
To pass an event with the redirect to the offer link, add the GET parameter with the event to your Click URL:
https://tracker.com/click?lp=1&event1=999
Passing events in conversions
To pass an event with a conversion, add the GET parameter with the event to the conversion link:
https://tracker.com/click?cnv_id={clickid}&event3=999
Note that if you have the Ecommerce status-scheme enabled, events event25-event30 will be unavailable.
Use examples
Mobile bots percentage
It's easy to track mobile bots on a landing page using events. This script checks if the screen orientation of the mobile device is defined. If it's not defined, the click is identified as a bot. .
<script>
const clickid = new URLSearchParams(window.location.search).get('clickid');
const is_bot = typeof(window.orientation) ? 1 : 0;
fetch("https://tracker.com/click?upd_clickid=" + clickid + "&event9=" + is_bot, {
    mode: 'no-cors',
  });
</script>
Replace tracker.com with your campaign domain.
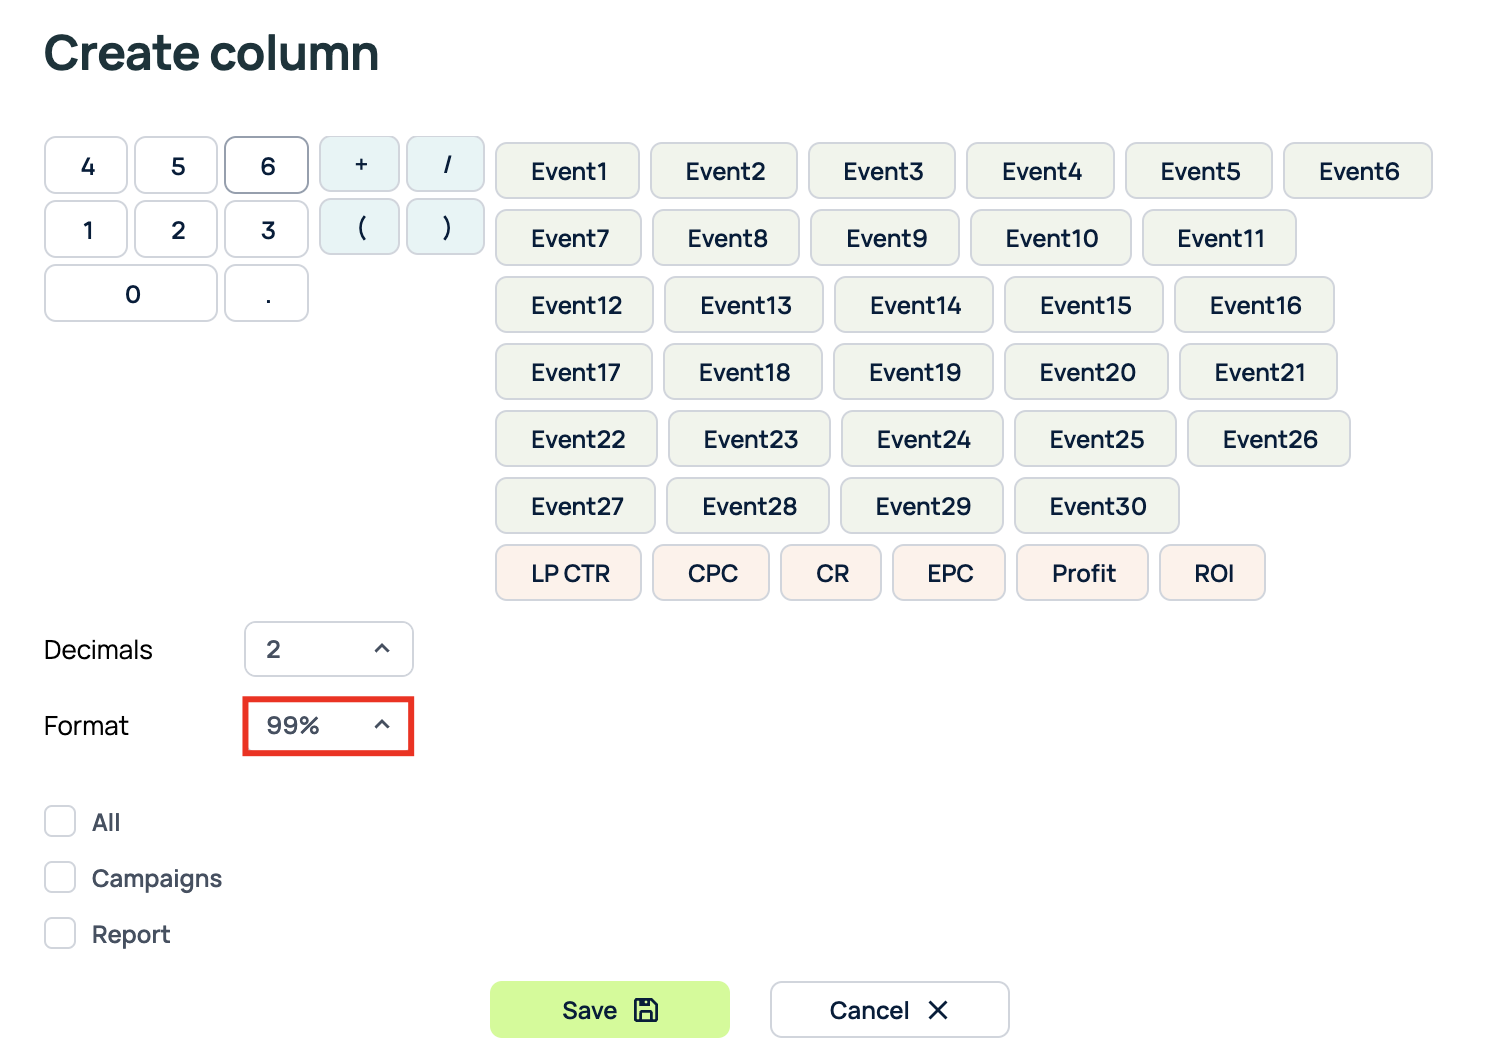
Go to Settings > Columns > Add custom column and create a new column with the following settings:
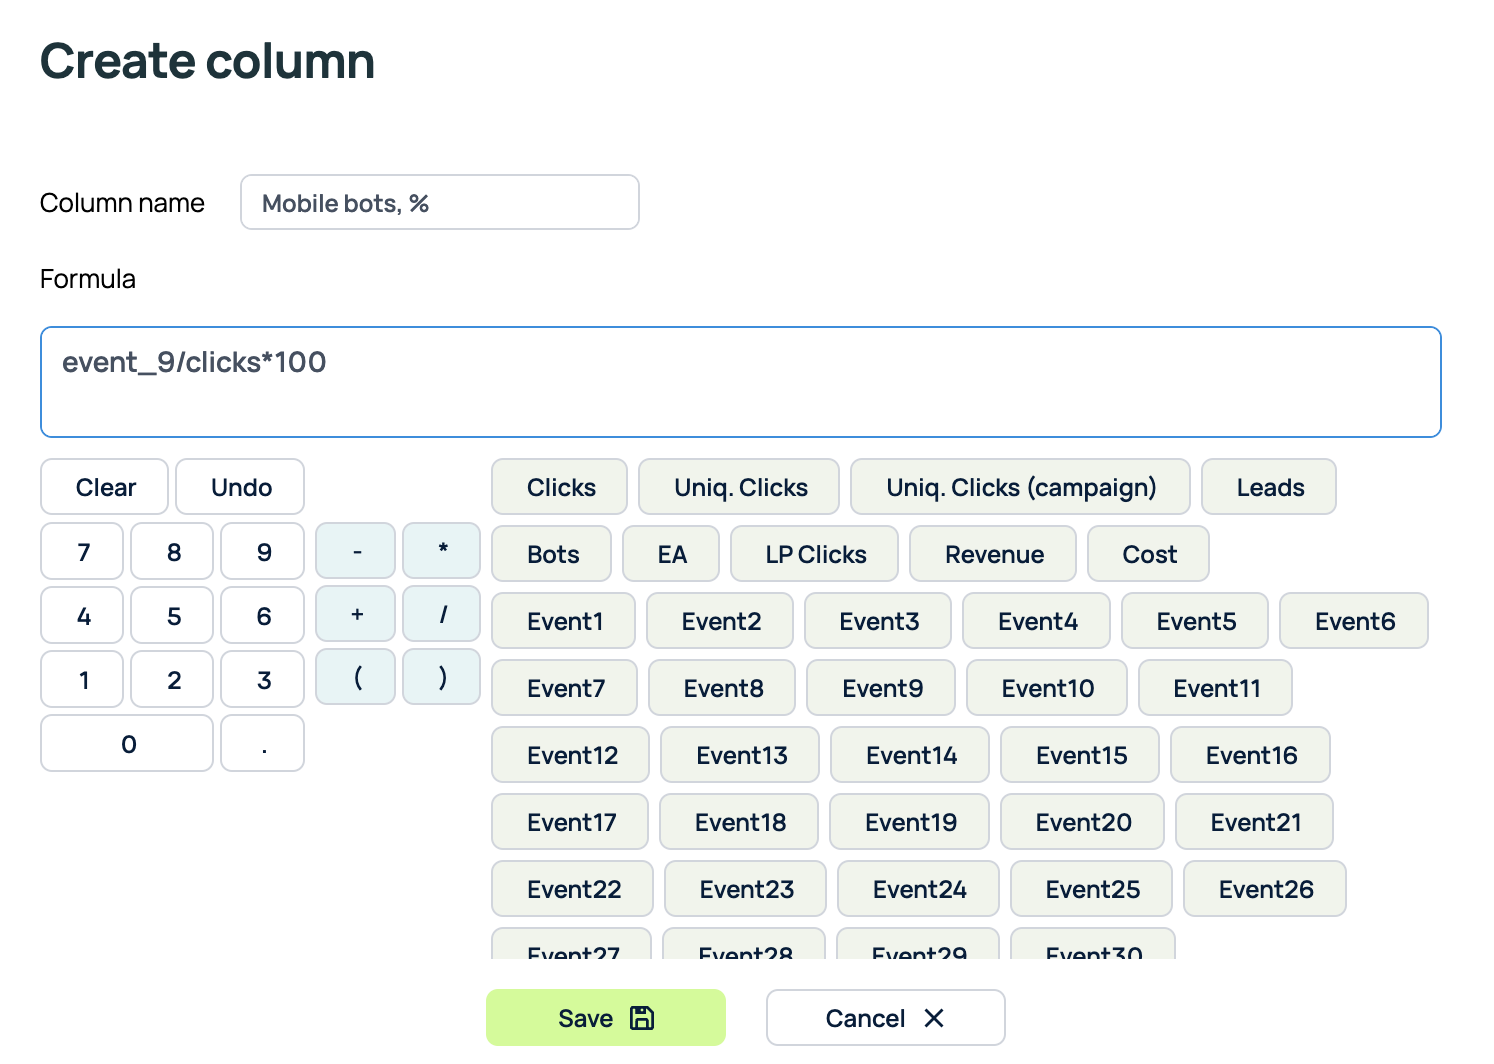
Then add the clickid token to the URL in the settings of your landing page in the tracker:
Now you can track the percentage of mobile bots using the custom column Mobile bots.
Note: This example is a demonstration of how to filter traffic by a certain condition. If you need more advanced bot traffic tracking, it's better to use integration with a specialized service, such as Magicchecker.
Percentage of users who used the scroll
This can be useful if you use long landing pages where the user needs to scroll to convert. By using information about the percentage of scrolls, you can understand how interesting your landing page is, how active the traffic is on a particular publisher, etc.
Place the following script on the landing page:
<script>
const clickid = new URLSearchParams(window.location.search).get('clickid');
var scroll = 0;
 window.onscroll = function() {
     if(scroll != 1) {
            scroll = 1;
            fetch("https://tracker.com/click?upd_clickid=" + clickid + "&event1=1", {
    mode: 'no-cors',
  });
    }
}
</script>
Replace tracker.com with your campaign domain in the tracker
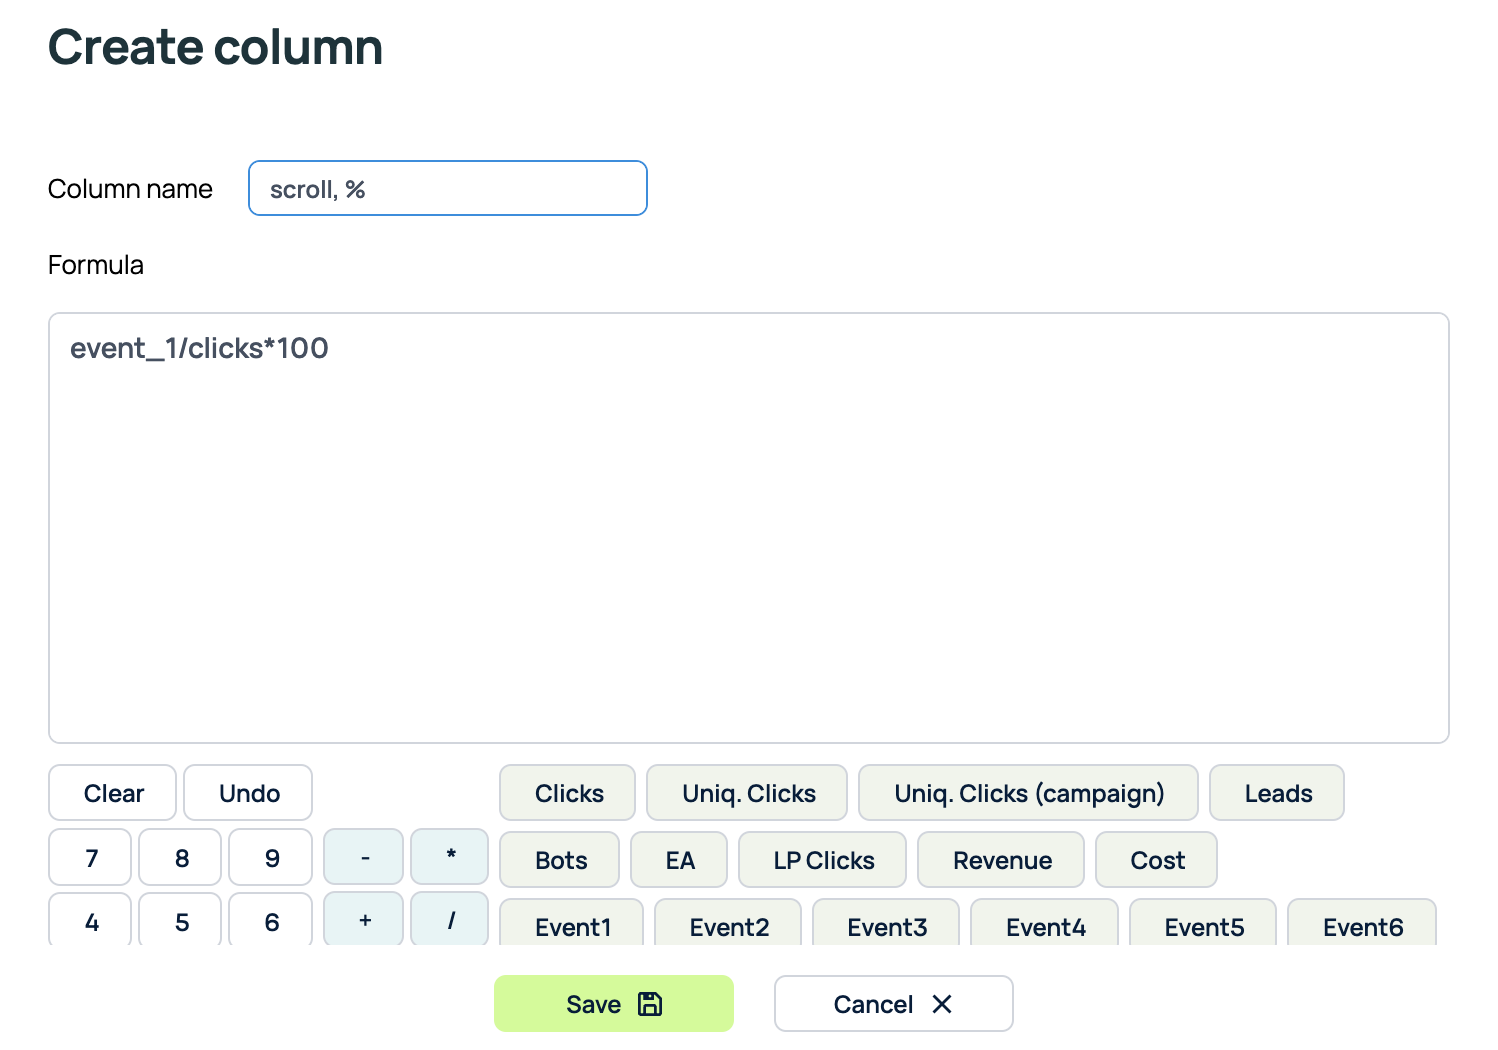
Go to Settings > Columns > Add custom column and create a new column with the following settings:
Then add the clickid token to the URL in the settings of your landing page in the tracker:
Now you can track the percentage of users who used the scroll on the landing page.
Ping the tracker after 30 seconds on the landing page
With this script, you can see the percentage of people who spent a specified amount of time on the landing page:
<script>
function pushToTracker(){
        const clickid = new URLSearchParams(window.location.search).get('clickid');
        fetch("https://tracker.com/click?upd_clickid=" + clickid + "&event7=1", {
    mode: 'no-cors',
  });
    }
    function pushAfterTimeout(timeout) {
        setTimeout(pushToTracker, timeout*1000);
    }
    var TIMEOUT_IN_SECONDS = 30;
    pushAfterTimeout(TIMEOUT_IN_SECONDS);
</script>
Replace tracker.com with your campaign domain in the tracker.
Go to Settings > Columns > Add custom column and create a new column with the following settings:
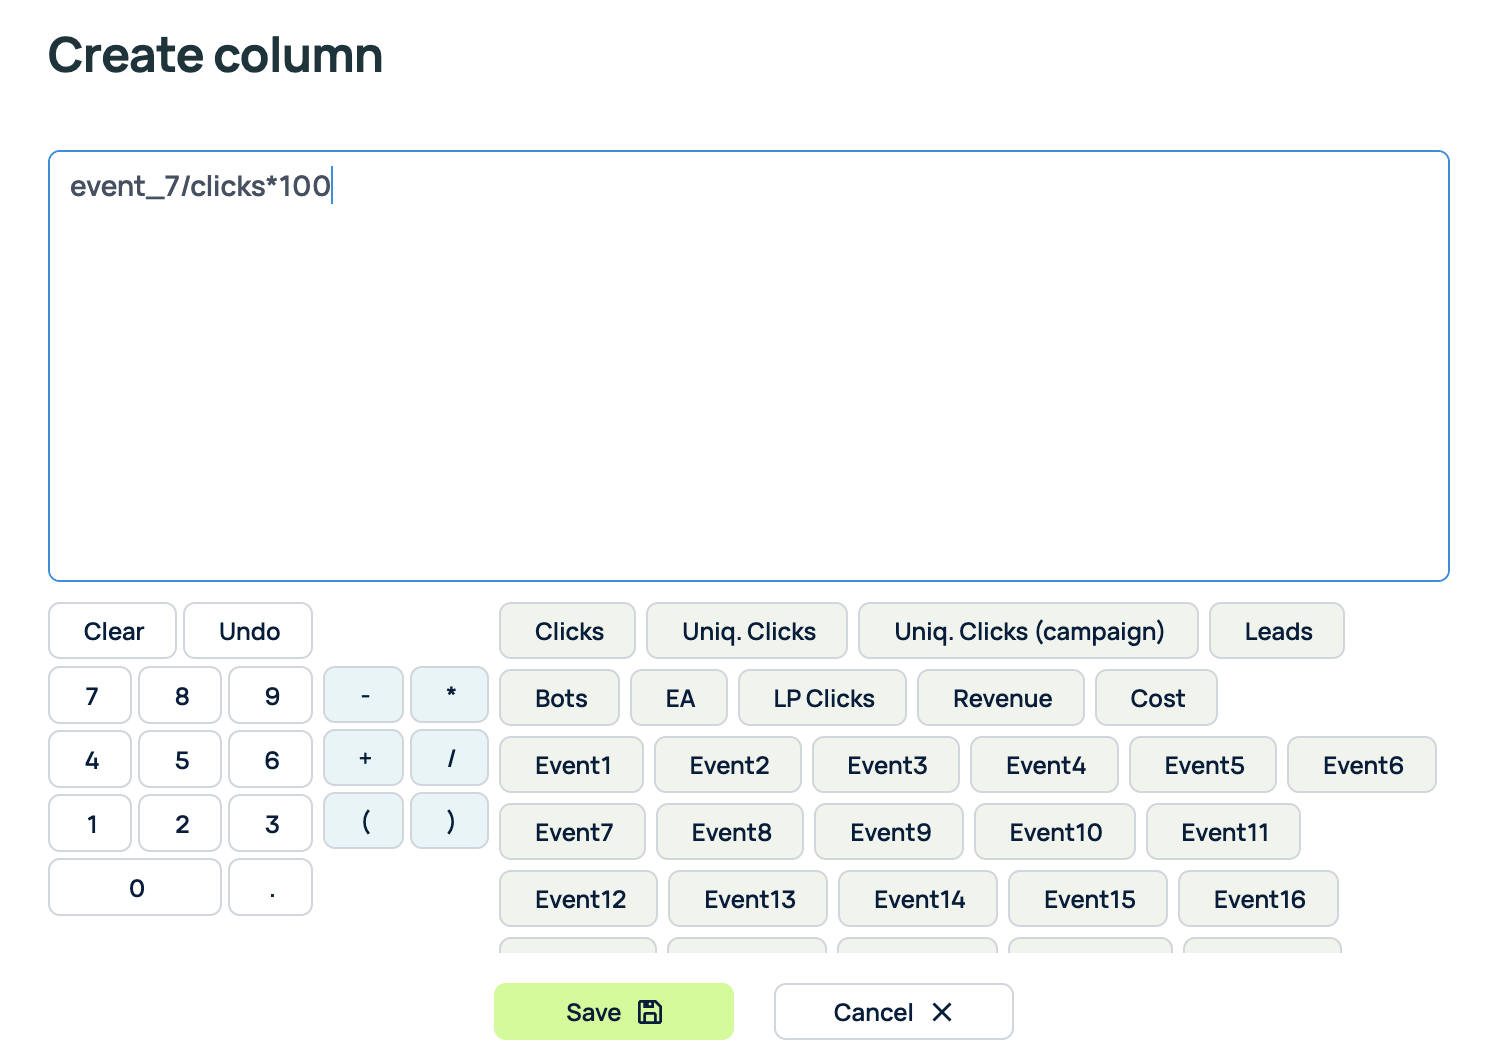
Then add the clickid token to the URL in the settings of your landing page in the tracker:
Now you can track the percentage of users who spent more than 30 seconds on the landing page.