Adding a traffic source
- Main settings
- Advanced settings
- Templates and integration
- Traffic source tokens
- Encrypting tokens
- Video
To add a traffic source to Binom, go to Traffic sources and click Create.
Main settings
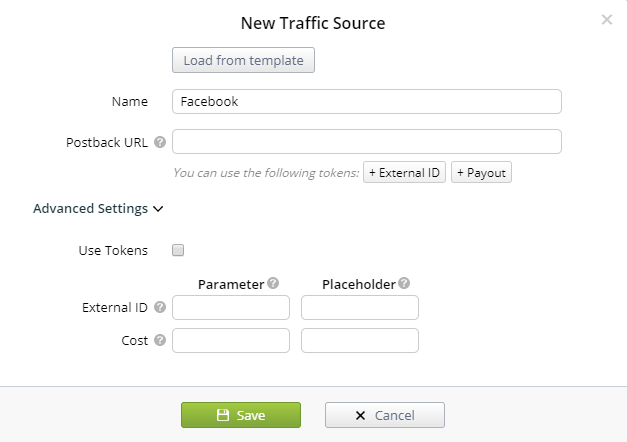
Click Load from template to select a premade template for your traffic source.
Name
Traffic source name.
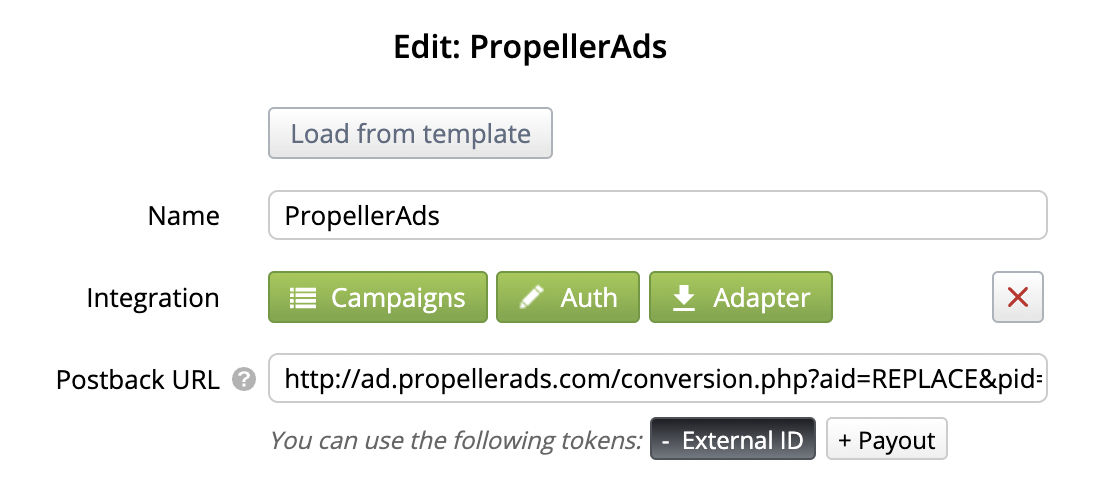
Postback URL
URL for passing conversions to the traffic source.
External ID
Click's ID in the traffic source. Mandatory for Postback URL.
Cost
Used to receive the click cost from the traffic source.
Advanced settings
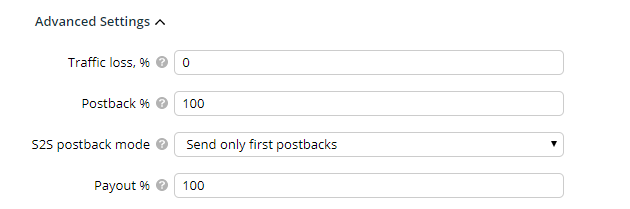
Traffic loss %
The percentage of traffic loss. Used to adjust CPC (cost per click) to reflect the lost traffic and its costs in the overall campaign cost in Binom. Does not affect existing campaigns.
Postback %
The percentage of conversions that will be sent to a traffic source. For example, at 50% Binom will send every second conversion. Does not affect existing campaigns.
S2S postback mode
Choose whether to send all conversions, only the first conversion, or only E-commerce-approved conversions. Affects all existing campaigns with the specified traffic source.
Payout %
The payout percentage that will be sent to the traffic source. If the real payout is $10 and Payout % is set to 50, Binom will send $5 as payout to the traffic source. Does not affect existing campaigns.
Templates and integration
Binom has preinstalled traffic source templates. Click Load from template to open the full list.
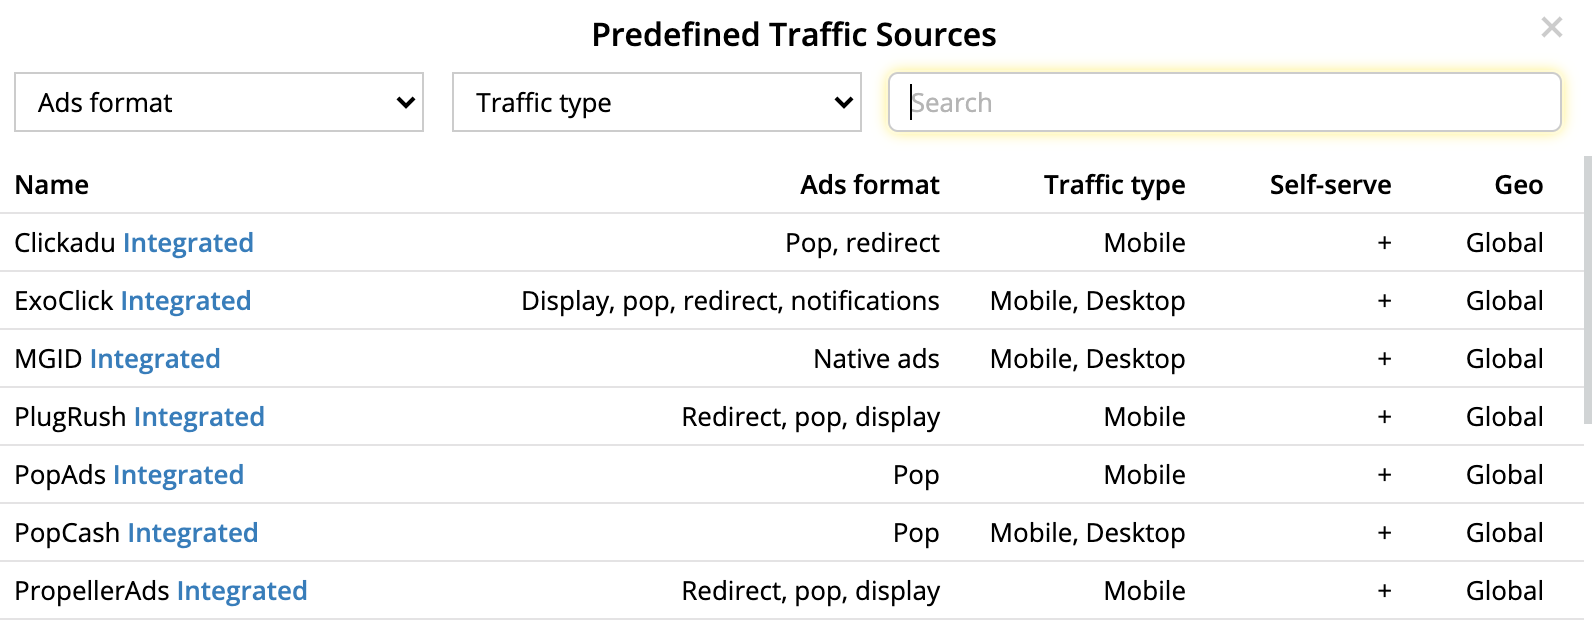
After selecting a traffic source from the list, all of its settings should appear in the editing window.
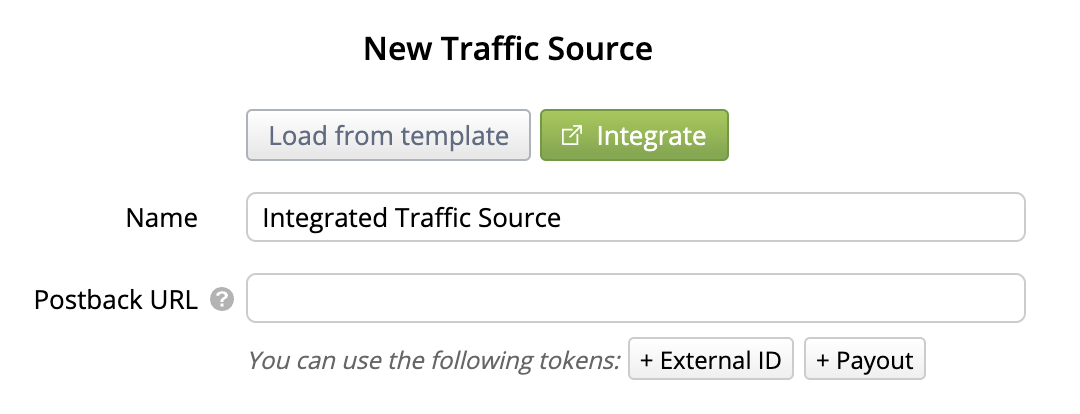
Integration
Some of the more popular traffic sources can be integrated in Binom. This is used to start or pause campaigns in the traffic source via the Binom interface.
-
Integration setup and details
-
- Select the traffic source you'd like to integrate (it needs to be marked as Integrated). Click Integrate when creating that traffic source:
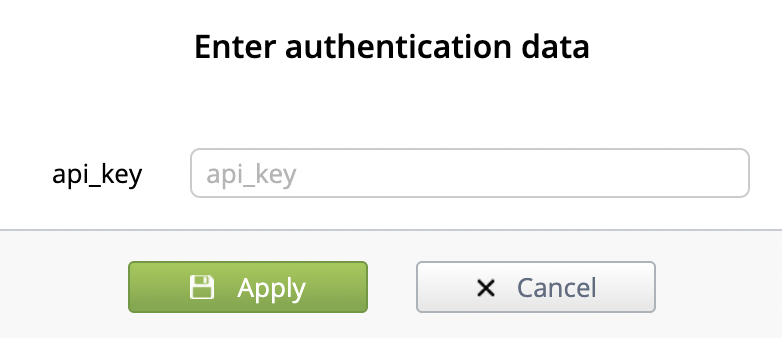
- Enter your login and password or your API key (usually found in the settings of your traffic source).
- After a successful authentication, 3 new buttons will show up in the traffic source creation window:
- Adapter, used in the rare cases when there was a change in the traffic source authentication methods.
- Auth, for changing your private authentication details (i.e. API key or login and password).
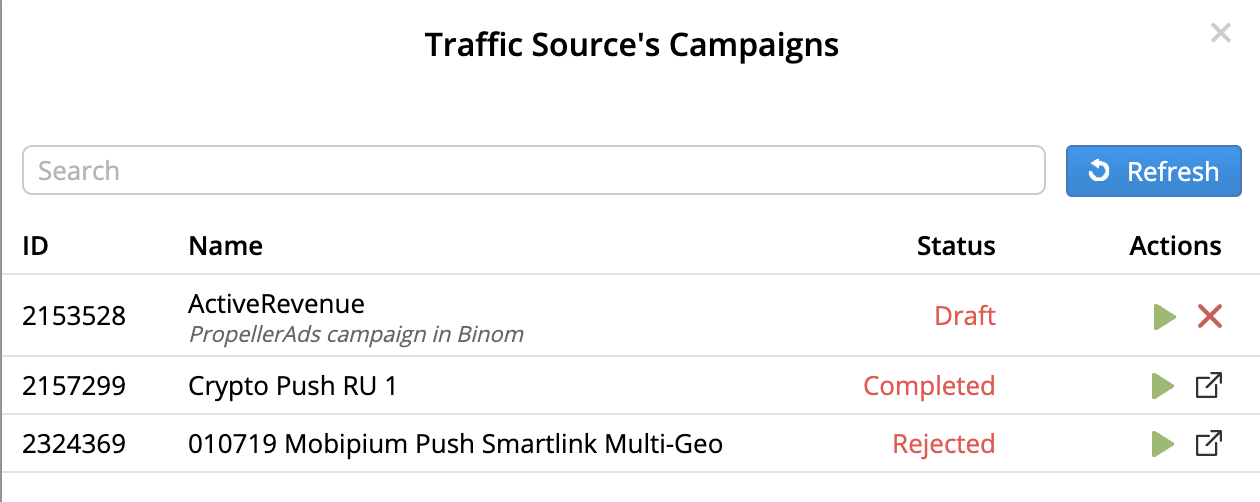
- Campaigns, for viewing the campaign list in your traffic source of choice:
- Campaign ID, its name, and status are available for viewing.
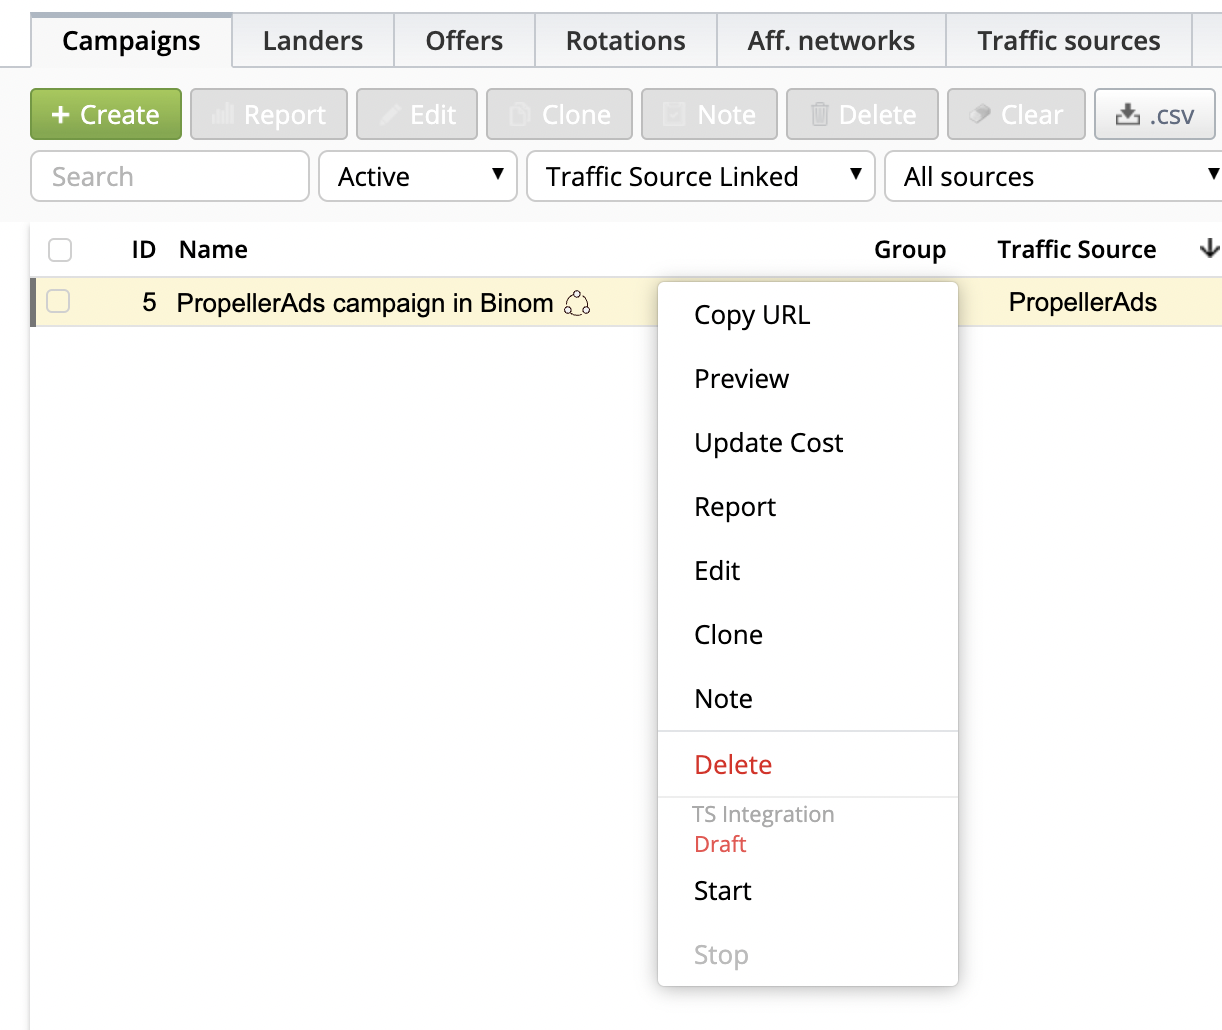
Also available are two Actions: pausing or unpausing your traffic source campaign and linking it to any of your Binom campaigns. If you link a Binom campaign this way, its name will also be visible under the corresponding traffic source campaign name, as seen on the screenshot above. - After linking a campaign like so, you will also be able to pause the linked traffic source campaign via the dropdown menu when you right-click the Binom campaign:
- Opening the dropdown menu will also trigger a campaign status check, and you will see its updated status:
- Linked campaigns and traffic sources with integration enabled will be marked with the
 sign.
sign.
-
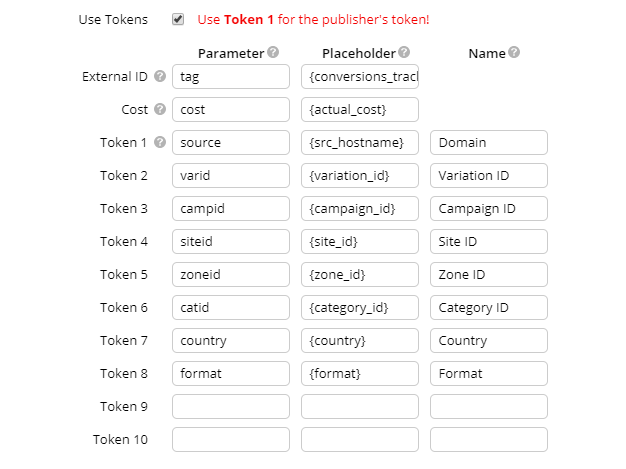
Traffic source tokens
To use tokens, check the Use tokens box. Each traffic source has its own set of tokens. Tokens can be used to pass parameters like device, OS, ISP, country, publisher, and so on from your traffic source to Binom.
The maximum length for a token value is 512 characters.
Parameter
URL parameter that will contain the token value.
Placeholder
Token used by the traffic source.
Name
Token name that you will see in campaign reports.
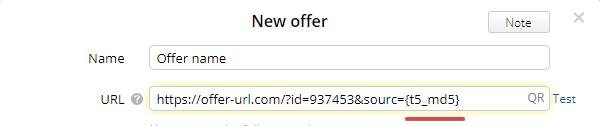
Encrypting tokens
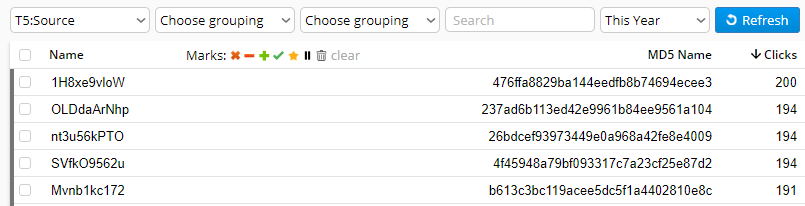
When passing traffic source tokens to a landng page or an offer, you can hide their real values. To do that, instead of {t1}, {t2}..{t10} specify {t1_md5}, {t2_md5}..{t10_md5}.
To view the encrypted token values in your stats, select the MD5 Name column and click Save:
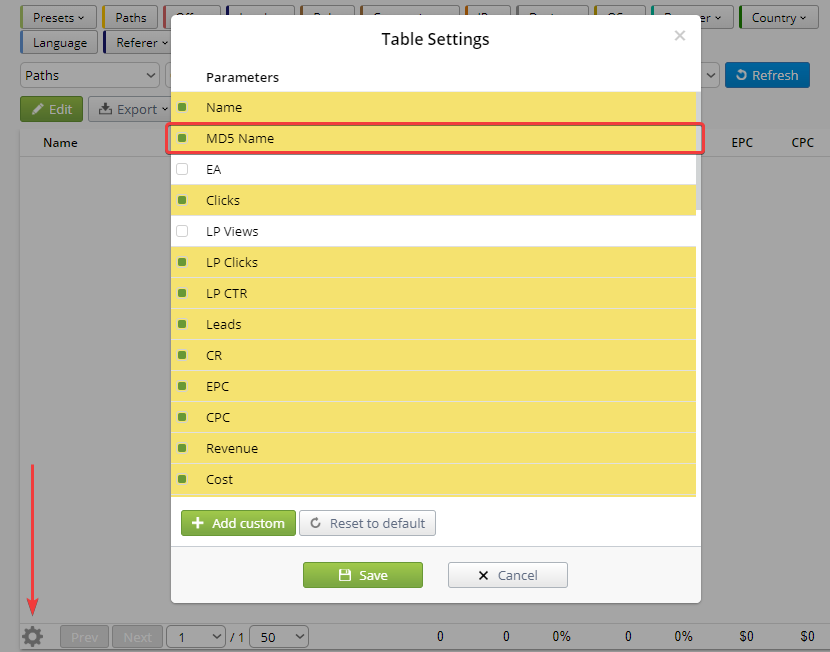
Now you will be able to see the encrypted tokens on the statistics table:
Video